January 10, 2014

Garlic Crusted Pork Roast

When is the last time you really looked in your freezer?  I know you might go in there every day for a few ice cubes or a bit out of the ice cream you try to hide from yourself, but there are probably a few secrets lurking in there.


Last week, when I made my food inventory (seriously, do it.) I found a bag of really good pistachios, a pint of my favorite sorbet, and the melange of meats thrown in when they were reaching expiration.  After getting through the ground chicken with the green curry chicken chili, I decided to make a lovely Sunday dinner with a sirloin pork roast.


For larger cuts of meat, I like to season the outside like crazy.  My pork roast was no exception; mustard seeds with a little bit of dried thyme were crushed in a mortar and pestle and then massaged into the seasoned pork roast.  In order to help the spices adhere, I dried the roast with paper towels.


I don't have a roasting rack, so I engineered one out of a bed of thick cut red onions and granny smith apples.  I propped the seasoned roast on the fashioned rack and then covered it with finely minced garlic and olive oil.  Before putting into a 325 F oven, I made sure to put in a temperature probe.


I cooked it low and slow for an hour plus, until the pork reached an internal temperature of 145 F.  The finely minced garlic crusted the pork roast without burning, thanks to the low temperature.  I was picking them off while slicing, so addictive!


To top the pork, I made a quick honey mustard finished by blending in some of the roasting rack onions and apples.  I think this was Lisa's favorite part!


To accompany, I made a quick side of roasted brussels sprouts with apples while the pork rested.  Hopefully, this recipe will prompt you to dig in your freezer and see what goodies are hiding in there.  I'm certainly pleased!


January 09, 2014

Roasted Red Grapes

"Your oldest friend will be your sibling."

That is the truest piece of advice I have ever gotten from my mom, and I'm so happy that I have that in my sister Lisa.  I remember hearing that a lot growing up, especially when we were at each other's throats.  We didn't really become close until we were both in high school, when we had an hour in the car with each other every day commuting to school.  She was too small to sit in the front seat so I looked like her chauffeur, but the forced intimacy turned into the best friendship I've ever had in my life.


Years later, we not only live together but still like each other after a year and a half of cohabitation!  We watch far too many disney movies, listen to way too much terrible 90s and 00s music on grooveshark while doing the Ger dance, and average seven jinx moments a night.  We're pretty embarrassing, but in the best possible way.


When we first moved into the condo, I "christened" it by making one of our favorite meals: chicken burgers.  I hadn't cooked in about three weeks by that point, due to my pilot light in the old apartment going out during a crazy summer thunderstorm and everything being packed up, so I went crazy.  Fresh buns from the bakery, roasted garlic to freeze up and put in some homemade mayonnaise, and roasted grapes.


This week, I had a bunch of chicken I roasted up after making stock.  We were brainstorming ways to use the rest of it when I mentioned the roasted grapes in passing.  Lisa stopped me immediately and said, "Wait, you can roast grapes?"  I guess she forgot about them in the chaos of moving in, so of course I had to remind her!


Roasted grapes are a simple way to add a savory-sweet element to a sandwich.  And it couldn't be simpler!  Just a hot oven, grapes tossed in olive oil and thyme leaves, and finished off with a little red wine vinegar.  Add it as a condiment, put into chicken salad, or just eat it plain like me!  Best part?  Lisa really liked it.


January 07, 2014

Roasted Cauliflower Puree

I'm so lucky to have people in my life who will indulge my food obsessions.  I grew up watching cooking shows on PBS with my Dad, can talk for hours with my Aunts about what to cook, and have one of the best cooking buddies in the entire world, my friend Brad.  We met in college in our intro to engineering class and have been close ever since.  Our junior year, we had a French cooking night where we made duck a l'orange, garlic roasted potatoes, haricot verts, and red wine poached pears.  It is in my top five of meals I've ever made or eaten in my entire life and we still talk about it to this day.


When he moved to the DC area last year, we started cooking together a couple times a month.  Wednesday nights were reserved for our most interesting of culinary creations.  The notable meals have included chorizo spiced mussels, beef wellington, and a fall inspired pork chops with apple cider gravy.    Right before Christmas, we attempted a roasted cauliflower puree that I could not get out of my head.  It was rich, flavorful, and the perfect complement for a great piece of steak!


I had to bring home this dish to my family for Christmas, but I wasn't as pleased with the texture this time around.  I think that our oven may have been a bit hotter than Brad's so the outsides of the florets got the beautiful caramelization provided by roasting but were still a bit "al dente" in the middle.  Not great for a puree.


Being a person who can't let sleeping dishes lie (read: two batches of bacon caramel in one week), I tried one more time.  This time?  I steamed the florets for about 5 minutes, dried them in the oven on a baking sheet at 400 F for five minutes, and then coated them in a little olive oil to roast at 400 F for 10-15 minutes until the florets developed some gorgeous roasted color:


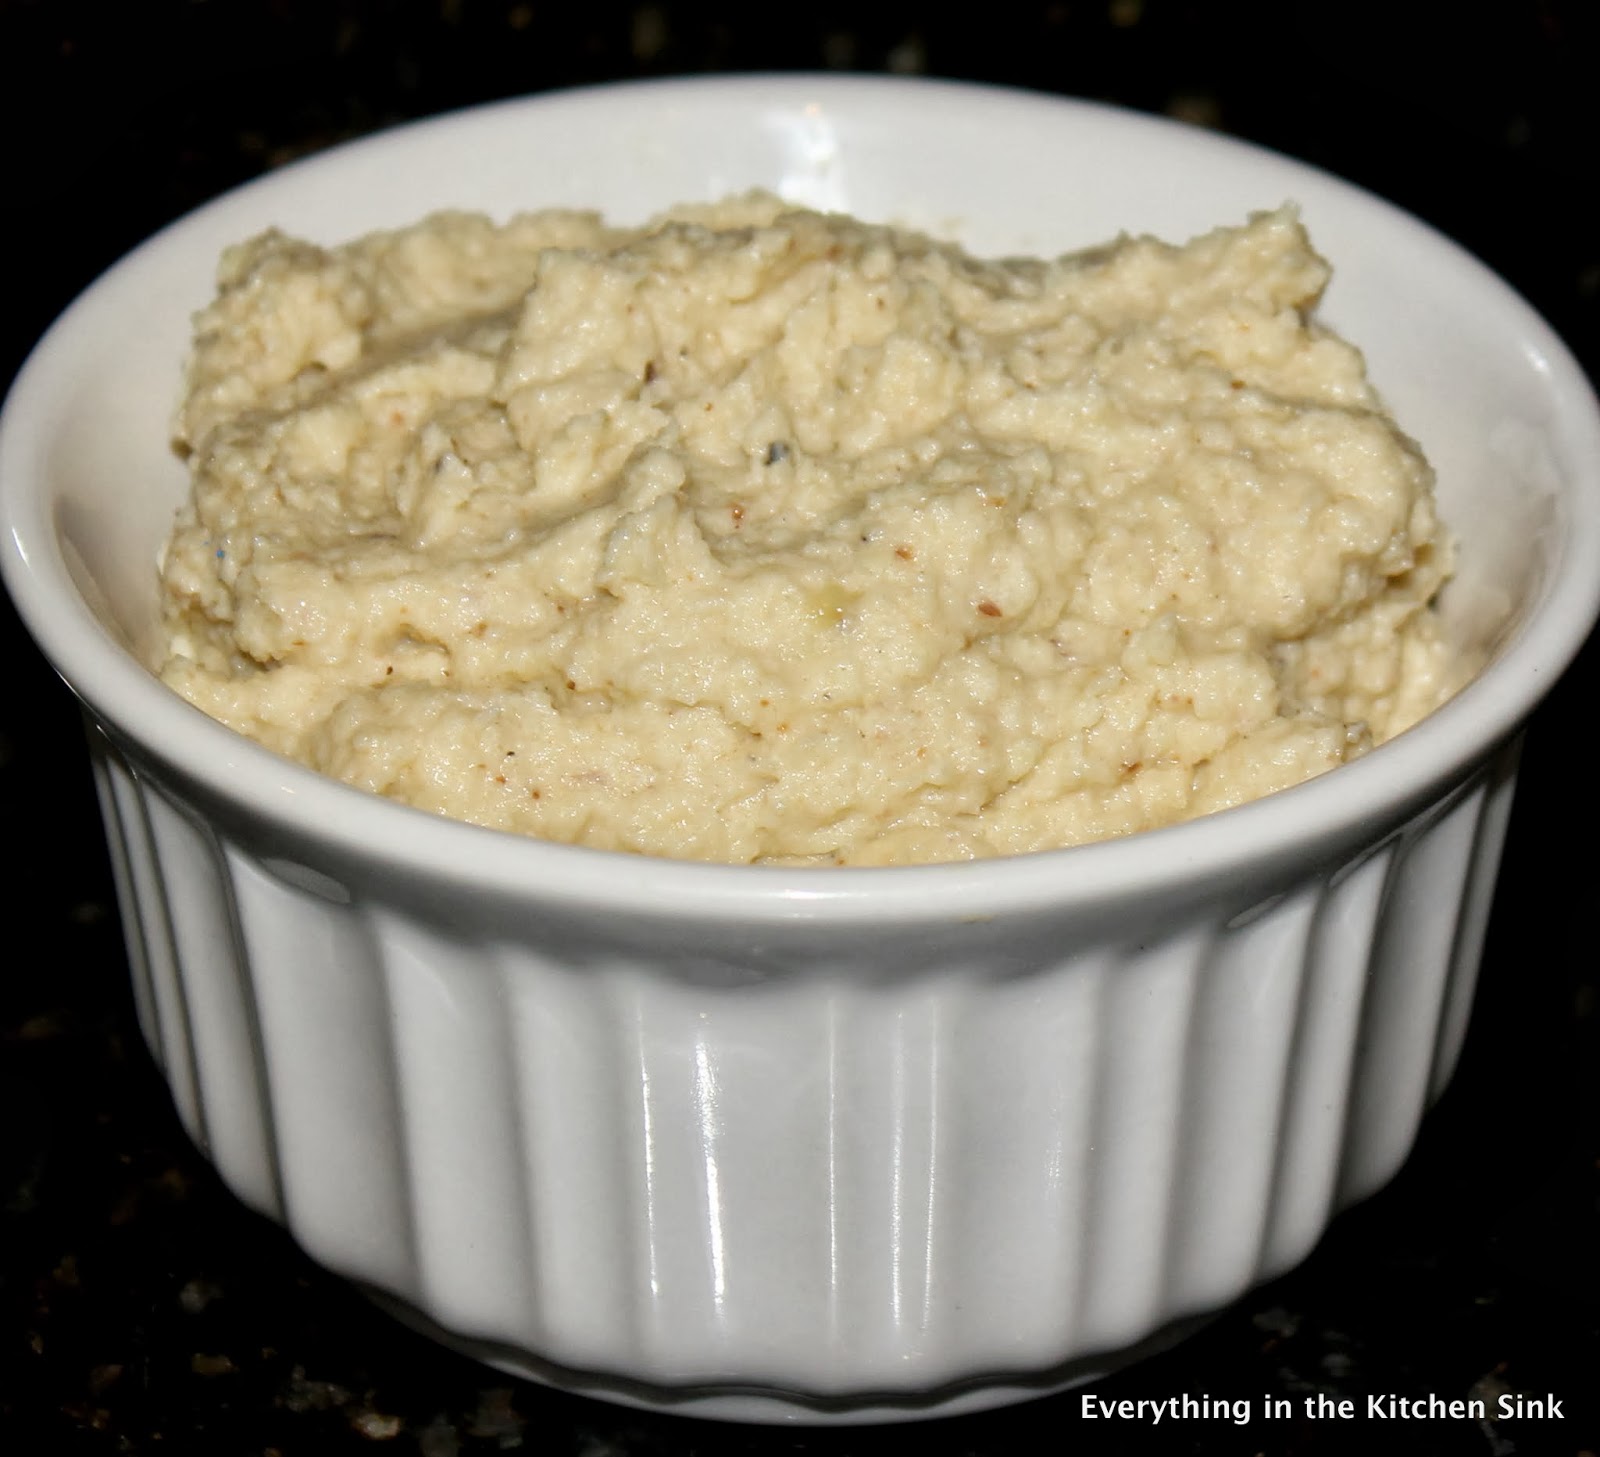
While still warm, I put the (fully cooked!) florets into a food processor and added a little butter, a splash of cream, a couple cloves of roasted garlic, and salt and pepper (white pepper if you've got it).  Buzz it up until you have a smooth puree, adding a little more butter if you want a silkier finishing texture.  The results are incredible, described by my sister as "heavenly."  It's always high praise when a formerly picky eater loves your food; I will never stop delighting in any yum I elicit out of her.


Welcome, Brad, to your first of many posts on Everything in the Kitchen Sink!  Insert obligatory picture of us as babies in college…


January 05, 2014

Bacon Caramels

My Christmas present to myself this year?  A candy thermometer!  Despite originally buying it for homemade marshmallows, I wanted to play with my new "toy" as soon as possible.  So, I decided to make a batch of caramels as a host gift for New Years Eve.  And not just any caramels, BACON caramels!  I love the contrast of smoky, crunchy bacon in desserts and as "passé" as it may be I'm still obsessed over salted caramels.  And even more perfect, the hosts made bacon jam as one of their wedding favors.  This was just me repaying the bacon favor!


Unfortunately, I didn't love the ones I brought to the party.  I think I let the sugar-water-corn syrup mixture go a little too far before adding the cream, I candied the bacon so it wasn't as much of a contrast to the chewy caramel as I wanted, and I thought I could get away with not individually wrapping them.  That was a big goopy mistake!  All of the caramels managed to merge back together over the course of the evening.  Lessons learned, I guess, but I needed to get it right!


First thing to correct was to replace the candied bacon with super crispy pan fried bacon.  I let it cool completely and then crushed it up for topping the caramel.  Next, I had to start adding the cream mixture when the caramelizing sugar was a lighter color.  Once the sugar started to get a little bit of color, I stood with a watchful eye ready to turn off the burner and then add the cream.  This is one of those things where you probably aren't going to get it right the first time but you'll definitely learn your lesson when you taste the slightly bitter flavor of overcooking the sugar base.


And the final correction was the individual wrapping of caramels.  I cut out pieces of parchment paper just big enough to wrap around the cut up chilled caramels and then twisted the ends.  It is a bit of a finesse to get twisted ends without ripping the paper.  The best method I found was to wrap the parchment over the caramel like you're starting to wrap a present, push the loose ends on top together, and then twist at both ends in opposite directions.


I decided to make the batches half bacon and half salted because my sister is not a bacon fan (blasphemy, I know!).  About 6 slices of bacon will cover half of an 8x8 cake pan, so a whole package of would work for the entire batch with a few extra slices for the chef.  The side that wasn't topped with bacon got a healthy sprinkling of sea salt on top.  


Make these as a host gift and you will definitely get a second invite!

January 03, 2014

Green Curry Chicken Chili

Happy New Year!  Hope everyone had a lovely start to 2014, I sure did!  Good friends, good food, good champagne, and lots of opportunities to say the word "boner" over the course of the evening.  Seriously, try the game What's Yours Like.  Cards Against Humanity is so 2013.


I'm sure you've all made your resolutions to be healthier and more organized in 2014.  My resolution this year?  Only eat out when I'm with other people.  I think my slump into kitchen avoidance had a lot to do with how easy it is in my neighborhood to go and get good food.  I love my city but it is too tempting to order greek food through grub hub, grab a croque monsieur at the french bakery down the street, or choose between the 3 pho places in walking distance.  It's time to get back in the kitchen and take away the lazy route!


To start off my resolution on the right foot (the one with all the metal?  Maybe I should start it on the left foot), I created a kitchen inventory on an excel sheet.  I now know everything I have in my kitchen, how much I have, and when it expires wherever I go.  Seriously, I didn't realize how helpful this would be until I made it.  I know a lot of people aren't as ridiculous as me and I'm sure there is an app for this, but I can't shake my excel habit.  True story: I made an excel sheet of everything in my closet in middle school.  Organized by clothing type, brand, and color.  Yup, coolest kid ever.


In my inventory madness, I found a lot of things that I love in the my freezer and pantry that I had completely forgot about.  Namely, a frozen pound of ground chicken, frozen ginger root, a tin of green curry paste, and some coconut milk.  I have never liked the consistency of unfrozen ground meat, I decided to put my own spin of chicken chili.  My mother has been requesting a traditional chicken chili recipe from me for awhile, so sorry this one is a little off the beaten path, Ger.


Green curry paste was used to flavor the chili in lieu of traditional spices.  I added some right before adding the ground chicken and a little extra at the end to amp up the heat.  Completely optional, if you are a spicy food fan then the green curry just at the beginning will have a mild spice with a lot of flavor.  Instead of stock, I simmered the chili in coconut milk and added chick peas at the end as my beans.  Easy weeknight dinner, perfect with a little scoop of rice and a dollop of non fat yogurt.


So what are your New Years resolutions?


December 31, 2013

Champagne Baby Cheesecakes - Happy New Year!

I could make tons of excuses about why I've been away, but the real reason is that I lost my inspiration.  I hit a cooking brick wall, so to say.  BUT I'm back and it feels so good to play around in my kitchen again!  I thought I would ease back in the swing of the things with a Toasty classic: baby cheesecakes!


New Years is going to be a low key affair this year after two years of expensive shenanigans where we had the most fun hanging out in the room with everyone before.  Champagne, appetizers, and games await me in Glover Park, so I thought I would contribute to the night with my signature dessert with a New Years twist!  (And also a candied bacon caramel host gift, look out for that!)


I use my typical cheesecake base of 8 oz of cream cheese, 2 eggs, and about 1/4 - 1/2 cups of sugar and added champagne that I reduced to one quarter of its volume to concentrate the festive flavor.  The cheesecakes are topped with champagne macerated strawberries and then a strawberry champagne whipped cream, using some of the macerating juice and fresh champagne for a bubbly topper!


So what's your favorite kind of cheesecake?  What do you guys want to see me put in one next?


June 24, 2013

Pepper Jelly Baked Salmon

Look, a post not related to secret recipe club!  As much as I've enjoyed having something to force me to blog over the (long, ugh) ankle recovery, I think it's time to get back to cooking what I like and what inspires me.  While I've had some great recipes and really appreciated being featured twice on the site in as many months as I was apart of the group, it is time for me to move on.  Last month was just the perfect storm for reflection on the whole situation and I came to realize that I am no good at blog groups like secret recipe club.


Don't get me wrong, I did love being apart of the 50 Women Game Changers group started by Mary of One Perfect Bite and would be pleased to do something similar again if given the chance.  In terms of secret recipe club, however, I'm not the bubbly, cheery post-a-comment-on-everyone's-post kind of girl.  I didn't like that one person pretty much copy and pasted my instructions and that another person chose to post a recipe of mine that they didn't like.  If you don't like it, then try something else!  Isn't that the whole point?  I get that it is sometimes hard to cull from someone that has completely different taste than you.  I ran into that obstacle myself when I was assigned blogs with oodles of casseroles and crock pot meals because I don't cook that way (not to knock, just not my style at this point).  But I would try multiple different recipes and variations, really do my research, and try to find something that excited me.  Seeing members that didn't give me the same courtesy disillusioned me to the whole outfit.


So I thought I would post today about a blog that inspires me, not in a forced sunny way that isn't me.  Every day for the past five years, I've listened to the super hilarious Kane Show on Hot 99.5.  Since my sister moved back in the area, we will talk about our favorite parts of the show almost every night.  A couple of years ago, Kane posted a link to his wife Natasha's blog Little Pink Monster.  I devoured all of the content in an afternoon, pouring over the adorable toddler clothes, inspired meals, and beautifully honest posts about what is happening in her life, the things that most of us are afraid to say.  Some of my favorite posts were 10%, Transparent People, the chalk hair dye, and any and all disney princess tutorials!  I love her writing and really respect what she has to say.


Last week, she posted a recipe method that I knew I had to try for myself: Cheater's Salmon Florentine.  Her idea was to take a filet of salmon, creating a pocket for stuffing by butterflying the filet, and using spinach dip to "cheat" in the flavor of spinach florentine.  Instead of spinach dip, I used my favorite spicy and sweet pepper jelly and cream cheese dip (the one that is always out for tasting at Harry and David's).  I've made pepper jelly on here before, but tonight I "cheated" too and used a prepared jelly from my quarterly trip to the Foggy Bottom Trader Joe's.  To avoid the dreaded soggy breadcrumbs Natasha warned us about, I baked my stuffed and panko-topped salmon filets at 350 F for 15 minutes and then finished under the broiler for about a minute.  The salmon is perfectly cooked, the dip inside adds an easy spicy-sweet kick that pairs beautifully with the fish, and as promised the panko is perfectly crisp.  


Simple method, simple execution, simply delicious.  I can't wait to see what else Natasha has in store! (And I hope my fan-girling won't lead to her and her husband unfollowing me on twitter...)

June 10, 2013

Buffalo Turkey Burgers - June Secret Recipe Club

Happy Secret Recipe Club reveal!  Just a quick ankle update before we dive in - I'm basically all better!  Still get a little puffy and uncomfortable, but there is definitely less strategic planning of my life based on how much time on my feet I can take.  My foot is finally fat enough to wear real shoes without any padding!  My rainbow of $10 flats is obviously frowned upon by my surgeon, so I am slowly building a collection of grown up responsible shoes in various bright colors (neon pink added yesterday, thanks Mamabear!).  I tried scar massage therapy to help sort out all the muscle weirdness around the metal bits and it seems to have helped out a lot.  All I need now is to pick up some speed for running so I can get back on the kickball field without having to yell at people not to peg me whilst hobbling to first base.  Progress!


But please forgive me for trying to catch up on regular-legged life and neglecting my kitchenly duties.  My sister and I have consisted on chicken burgers, buffalo chicken dip, and salsa the past couple of weeks, oops.  Which brings me to today's topic, the epic combination of our favorite go to dinners inspired by Jenny of Jenny's Cookbook: Buffalo Turkey Burgers!  This girl is awesome - mom of two with tons of inspiring recipes, drool-worthy desserts, and creative crafts to do with her girls.  I know I will be coming back to try these Yazdi Cupcakes, the inside of the cake looks incredible!


When I saw her recipe for Buffalo Chicken Meatloaf and the story of the meat balls being turned into meatloaf, I was instantly inspired to make her meatloaf into a burger!  My store ran out of chicken, so I chose lean ground turkey.  I added my usual grated onion and garlic to the burger base, took out the typical meatloaf ingredients, and went to town with the buffalo sauce!  Instead of adding melted butter to the meat, I cooked the burgers in a little butter and then recreated the melted butter - buffalo sauce combo to toast up the buns in the pan.  An easy sauce of bleu cheese, lemon juice, and sour cream with thinly sliced celery and red onion topped the burgers.


The result?  A spicy bleu cheesy mess of a burger that evokes all of the best parts of buffalo wings and Jenny's meatloaf.  Thanks for the inspiration!


And for some more inspiration....


May 13, 2013

Sourdough Vanilla Cashew Scones - May Secret Recipe Club

Yesterday, I went to charity 5K on the mall.  As I'm crossing the field to get to my group, I go down.  Left (good? not bionic at least) ankle and left knee rolled, awesome.  So by the end of the day (after still doing the walk because I'm a glutton for punishment) I end up walking like a penguin.  So, I'm back in my kitchen cooking on crutches.


Luckily, I planned ahead this week for secret recipe club.  I was assigned Shelley from C Mom Cook, who actually had me last month!  I was inspired by her baking audacity, with her daring challenges and sourdough surprises.  From pasta to pancakes to babka, Shelley has so many interesting ways to incorporate her sourdough starter.  


My starter is a little baby starter, only a few days old, so I supplemented the first feeding with yeast to ensure I would have a good starter by the time I had to bake.  I used whole wheat flour at Shelley's suggestion and kept it on my counter for the first week, covered with a dish towel.  I originally wanted to take one of her morning bun recipes and make it with the sourdough starter but the double ankle injuries meant I needed something fast and easy.  So, I settled on her sourdough scones.


And boy was in quick and easy!  A little bit of flour, very cold butter, and a lot of vanilla mixed in with the sourdough starter came together in the ten minutes it took to preheat my oven.  I used roasted unsalted cashews instead of dried cranberries and made a quick biscoff glaze to drizzle over the still warm scones.  I can't wait to work through the rest of her sourdough recipes because this was definitely a winner!


May 03, 2013

Funfetti Cheesecake Bites - (Secretly) Two Years Old!

Two years ago, I was at the end of the first year of grad school while also ending a long term relationship.  I had so much nervous energy without an outlet and knew I needed to throw myself into projects.  I joined a kickball league and a bocce team.  I started spending every weekend night on my girlfriends' couch to stay busy and not sit at home overanalyzing everything.  And most pertinent to this particular post, I started to write this blog.


For the first few months, I wrote in secret.  I was confident in my passion for food and could talk about it for hours, but I hadn't written anything other than design reports and immunology exams since high school.  I didn't feel proficient enough to add to the conversation, neither as an amateur cook nor a photographer.  I wanted to find myself and my style of cooking before I shared anything.


It was just me and my dinky point and shoot camera, terrible rental half-galley kitchen with no dishwasher, and low popcorn ceilings that let in absolutely no natural light.  I would write everything down in this little green notebook while I let every utensil, bowl, plate, and pan I owned soak in the sink.  The pictures were horrible and I had no idea what I was doing, but god I loved it!  Eventually, I saved up enough money to buy a "big girl camera" and decided to take myself public.  I am so happy that I did.  It was so fun to pour myself into this project, to really research food and try new things.  I love having a creative outlet and sharing my food and couldn't imagine a better way to de-stress at the end of the day!


So in celebration, yet another Toasty cheesecake!  I decided to go full-on birthday and rock the funfetti.  I couldn't use the box mix (on principle) so I turned to Christina Tosi of Momofuku Milk Bar for tips on how to recreate the flavor.  The secret to box cake fake out is cake flour, imitation vanilla extract (still not happy about it, but it does the trick!), and a whole bunch of rainbow sprinkles.  I used Tosi's recipe for funfetti cake crumbs, buzzed them up in the food processor, and approximated a funfetti version of the graham cracker crust!  I will definitely be using this trick for future cheesecake adaptations, it was so easy and a great way to impart more flavor!  A little bit of sour cream, a heaping half cup of sprinkles, and a healthy dose of imitation vanilla brought the birthday flavor to the cheesecake base.  When cooled, I topped the baby cheesecakes with a few more cake crumbs for a fun and festive finish!


One move, three broken bones, and two years later I think I'm finally getting the hang of this!  Thanks to my friends, family, and readers for supporting me in this ridiculous endeavor.  (And of course for eating my leftovers so I don't get fat... Most appreciated!)


Related Posts Plugin for WordPress, Blogger...